Kayla is a Machine
  • Blog
  • Recipes
  • Pinterest
  • About

[f]au[x] naturel

12/31/2011

0 Comments

 
To be honest, I couldn't tell you what my natural hair colour look like any more. Unless you knew me before high school, you've never seen it. But I decided, it's a new year so it's time for new hair. Time to go back to my roots.
Literally.
I tried to dye my hair what I thought was the same colour as my roots; the last time I tried to do that was Dec 2008. It turned out a lot darker than I thought it would and personally I like my hair much lighter (oh if only I was born blonde) but c'est la vie. The colour of my hair is just arbitrary to my life now. Over the years my hair colour has just become something that changes with the seasons and my boredom so I'm used to it being wack. Soon enough it'll be different again.

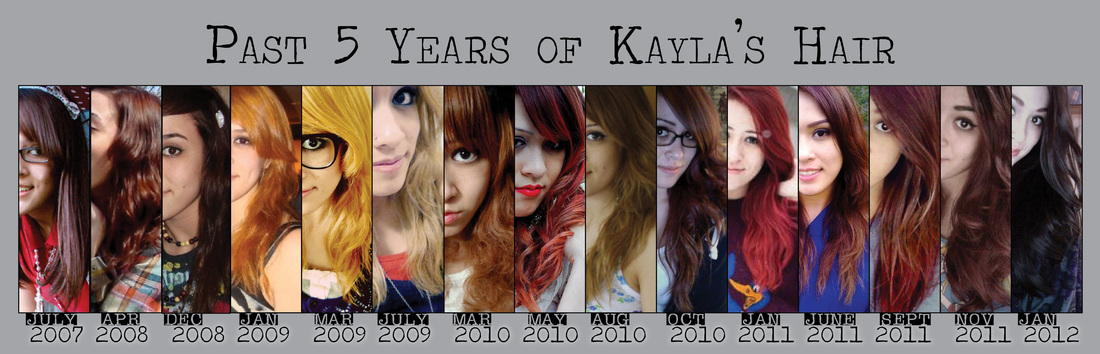
To show you how my hair has changed over the years, I made a chart-picture-type thing. Collage?
I don't know what I'm talking about. Here it is:
Picture
I wish my hair could be like July 2009 or Jan 2011 again, but that'd require bleach and so much effort I can't be bothered to do that right now. So I guess it'll be dark brown, my assumed natural colour, until the seasons change again.

This post has nothing to do with anything I normally blog about here. Maybe I can include a tip or something since I do a lot of DIY stuff here and my hair has basically become a giant ongoing experimental DIY project...
1. No matter how frustrated or bored you are, remember: cutting your own hair at 2 am is a bad idea.
2. Mixing a tablespoon of temporary red hair dye (i.g., Manic Panic) into your conditioner will help keep the colour fresh. But it will also ensure that you can't wear any light coloured shirts with your hair wet, stain all your towels and your shower curtain so it looks like that scene from Pyscho.
3. Dedicate one oversized t-shirt to hair dying so you don't ruin a new one each time you decide to change your hair colour.
4. Don't blog at 3 am because you will end up with posts like this.

Anyways, here's to a new year with new hair and hoping things only go up from here o
0 Comments

In the Kitchen: Chocolate Candy Cane Christmas Cookies

12/29/2011

3 Comments

 
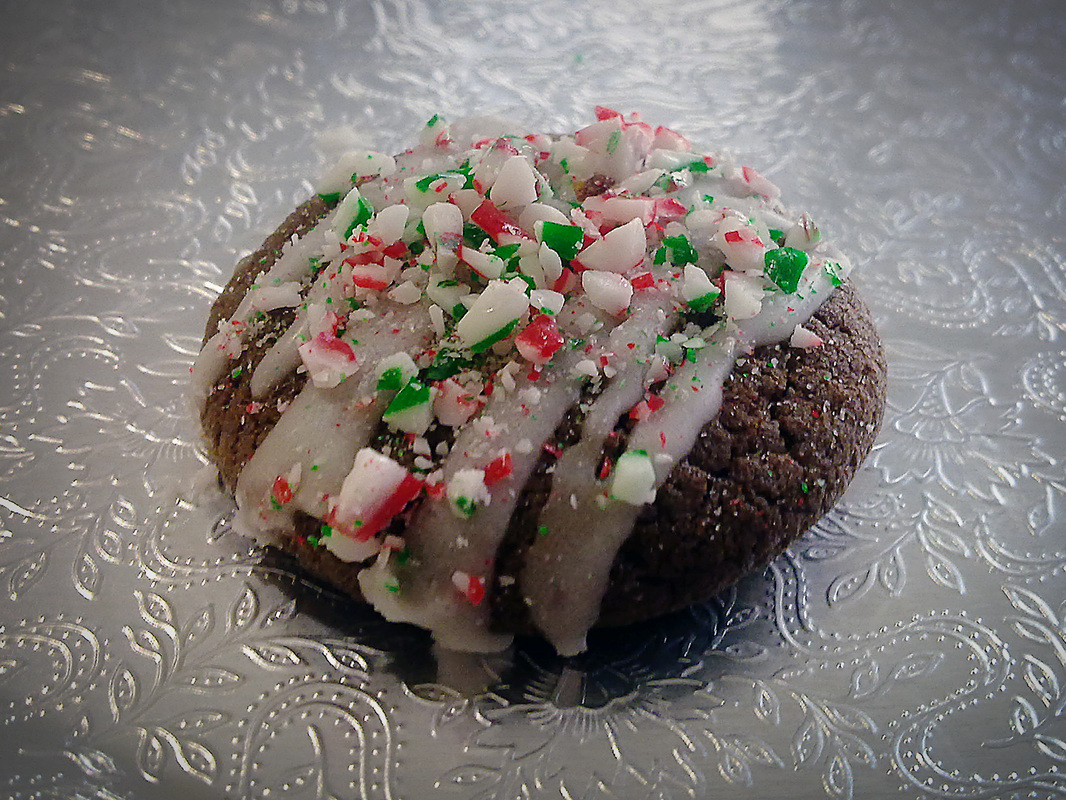
I searched for quite a while before finding a Christmas cookie recipe for my GHC dinner party that met all my stipulations (no refrigeration time, must be chocolate, must include candy canes, must be simple), and then finally I found this recipe. After reading all 47 reviews, I decided to go with it. I made a few slight changes so I will post what I did below if you want to give it a try.

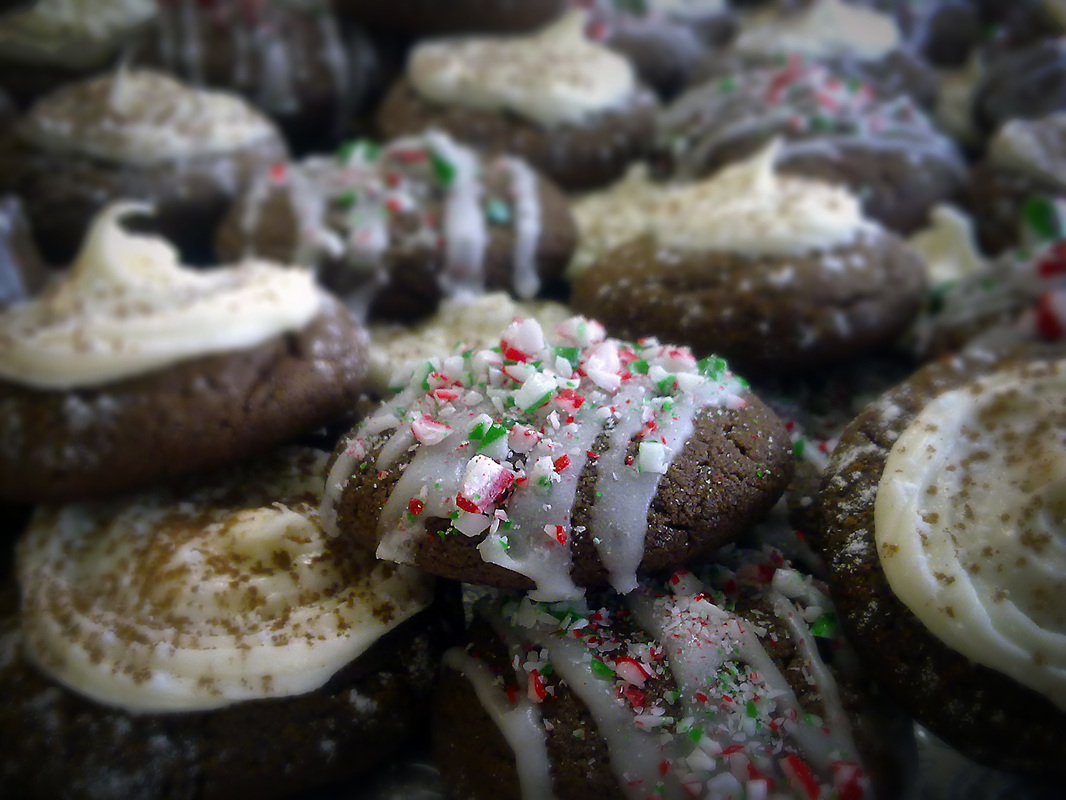
At first, I was disappointed with the results; the cookies were a little more dry and less sweet than I had anticipated (keep in mind, I have a very high tolerance to all things sugary). But then I discovered something, these cookies go great with tea.
Picture
I don't dip things in my tea, apparently some people do, but I find that a little strange. But dipping these cookies with a nice black tea sweetened with brown sugar was an excellent combination. To me, the cookies was just plain enough that pairing it with a sweeter tea gave it the right balance of sweetness and added moisture without the tea or the cookie overtaking the other. A beautiful pair.
Picture
Chocolate Candy Cane (or Cream Cheese) Christmas Cookies
Recipe yields about 6 dozen small (1.5 inch) cookies


Cookies
2 cups all-purpose flour
3/4 cups unsweetened cocoa powder
1 teaspoon baking soda
1/4 teaspoon salt
1 cup (2 sticks) unsalted butter, room temperature
1 cup packed light brown sugar
3/4 cup sugar
2 eggs
2 teaspoons vanilla extract
3 Tablespoons cinnamon

Peppermint Glaze
3/4 cup icing sugar
2 drops mint extract, or more to taste
5 teaspoons water, or more to desired smoothness
1/2 cup crushed candy canes

Cream Cheese Icing
1/2 cup cream cheese
1/4 unsalted butter
1 cup icing sugar
2 teaspoons vanilla extract


Directions:

Cookies
1. Pre heat the oven to 350'F
2. Sift together flour, cocoa powder, baking soda, salt, and cinnamon. Set aside.
3. In another bowl, using an electric mixer beat the butter and sugars together until fluffy. Add eggs 1 at a time and beat until smooth. Add in vanilla.
4. On low speed, beat in the flour mixture a little at a time until it is smooth.
5. Line pans with parchment paper and roll small 1 inch balls of dough and flatten slightly with your palm, spaced about an inch apart.
6. Bake for a total of 8 minutes, rotating pan halfway through. Cool for 5 minutes on the baking pan before transferring using a spatula to a wire rack.

Glaze
1. In a small bowl mix together the sugar and water until smooth.
2. Add mint extract and any more water if you see fit.
3. Transfer mixture into a resealable bag and snip a small hole in a corner; drizzle over cooled cookies and top with crushed candy canes.

4. If you want (I did), put the cookies in the fridge for 5 minutes to set the glaze quicker.

Cream Cheese Icing
1. With an electric beater, mix butter and cream cheese together.
2. Slowly add in icing sugar.
3. Mix in vanilla extract.
4. Add in more icing sugar if you see fit.
5. Using either a knife or piping bag, ice your cookies
6. If you want (I did), top them off with some sifted cocoa powder and put the cookies in the fridge for 5 minutes to set the icing quicker.

So there you have it, a Christmas cookie recipe with two ways to top it off, that goes great with tea. I will probably even make it with just the glaze with no peppermint extract or candy canes for after Christmas to go with my tea because it is such an easy treat. And I will probably make a half recipe, because if it's just staying in my house, I definitely don't need 80 cookies. Big portions is great for sharing at a party, but not for a house already filled with sweets.

Merry Christmas and a Happy New year to you all!
3 Comments

Brown paper packages tied up with string

12/23/2011

4 Comments

 
"Brown paper packages tied up with string, these are a few of my favourite things"; a perfect description of how I wrapped my gifts this year.

But stop!
Before you scroll down any further: if you are in a gift exchange with me, wait until after before you read this post or else you might see that I have you and ruin the surprise. I was going to wait until after Christmas to do this post but I couldn't help but post it earlier. But really, the instant people see the wrapping they will know it's from me anyways. So read on if you must.

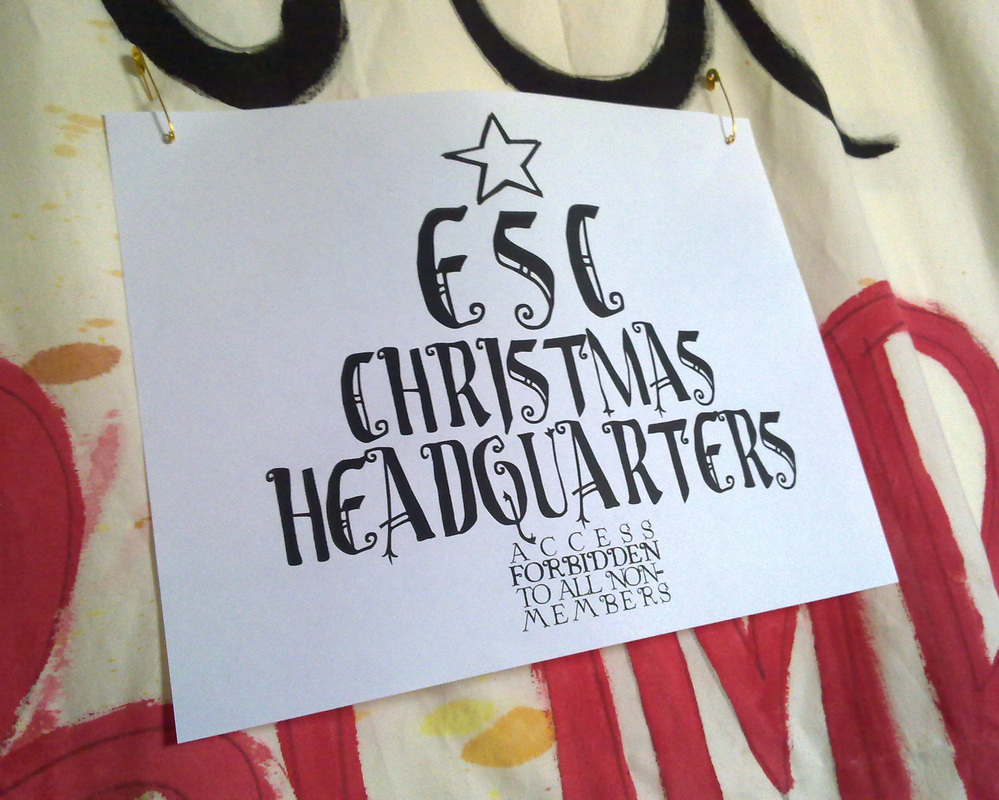
First I want to share the sign that's on my door right now in preparation for my filipino family's Christmas party on Saturday to try and ensure my bedroom doesn't get turned into a coat/baby/nap/teenager's hangout room.
Picture
ESC is the name a few cousins and I have dubbed ourselves. No need to ask what it stands for (and no, it's not actually the Edralin Sexy Club, that was a joke), because if you don't know then you probably aren't in it. Did you notice the words are kind of shaped like a Christmas tree? My sister didn't until I told her. It was actually an accident at first, but when I realized it looked kind of triangular I decided to give it a trunk and star.

But moving on to the real point of this post: the presents!
Picture
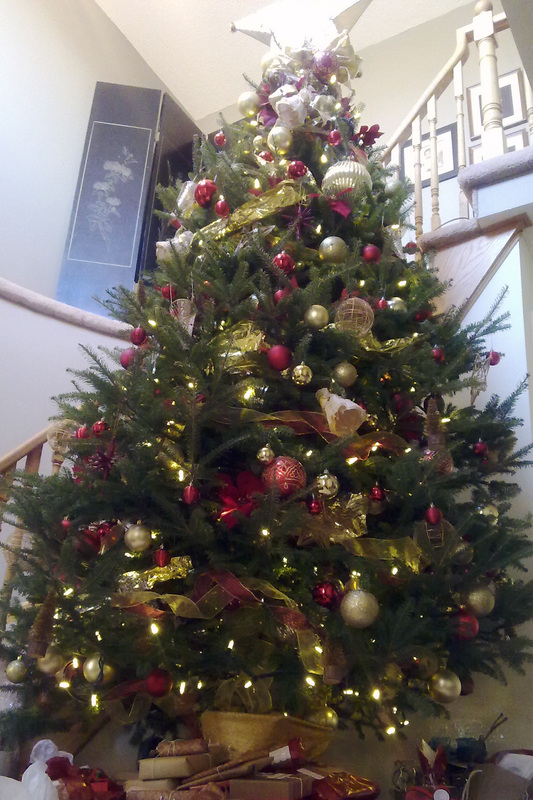
This is our tree: the picture doesn't do it justice because it is really decorated quite beautifully. My mother won't let us touch it, she spends the evening decorating it herself so it will be exactly how she wants since it's the first thing you see when you come into the house. And below the tree are...
the presents!
Picture
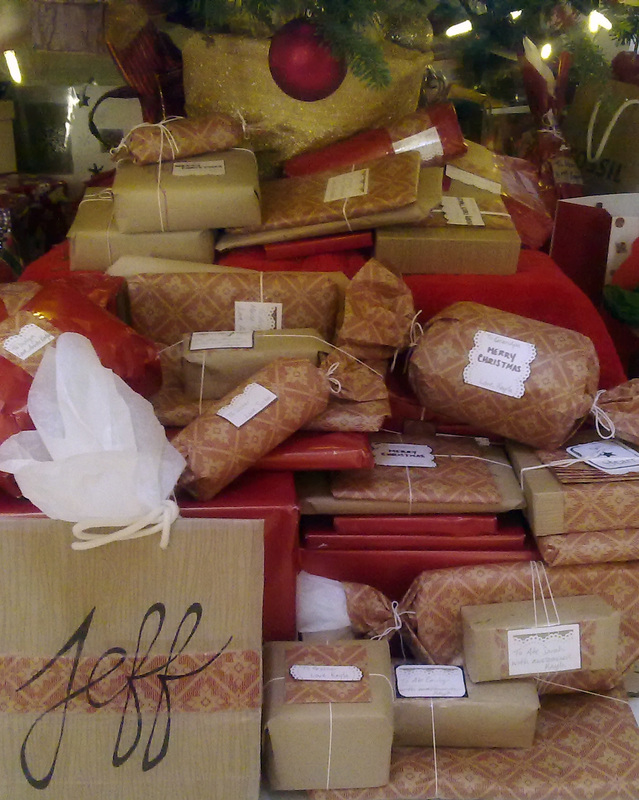
My gifts all match: brown craft paper and my favourite red and brown Christmas wrapping paper (from Ikea a few years ago. I want to savour it for as long as I can by using it mostly as an accent on bigger gifts) all tied up with white strings and labels. There are a few Fossil bags and boxes in there as well because they matched perfectly as well and I love the texture the wood grain print gives the package.

All of my favourite gift wrappings are for exchange gifts.
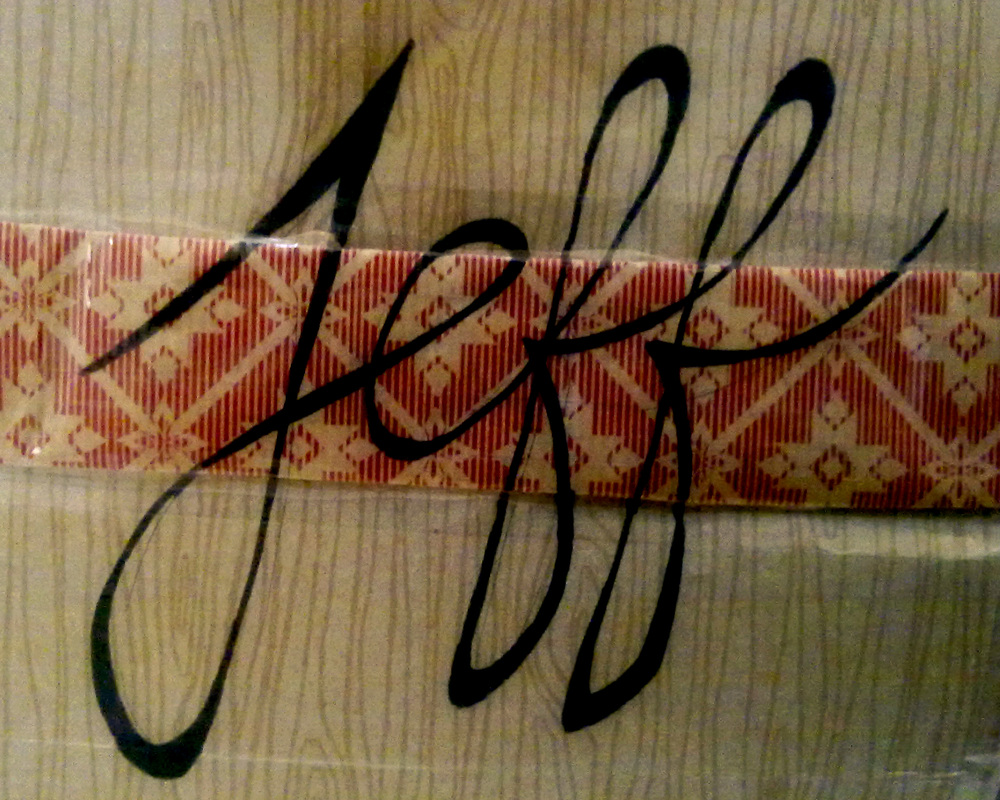
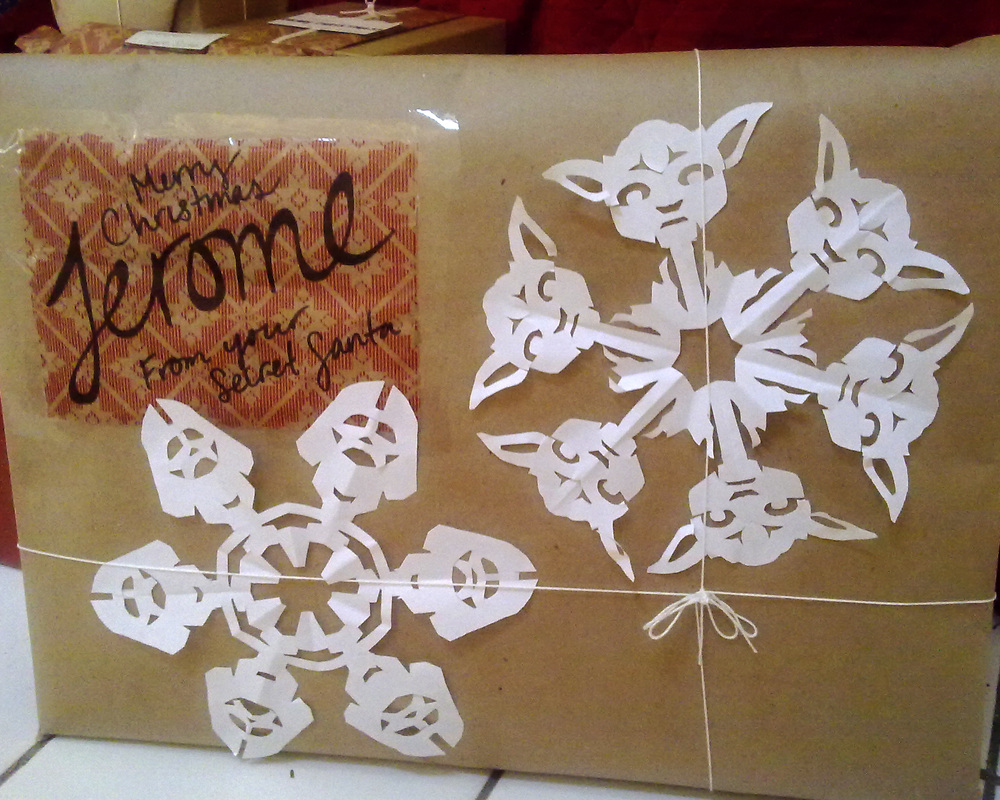
As you can clearly see in the picture above, I got my cousin Jeff for one of my gift exchanges. I used a Fossil bag and covered up the logo on the front and sides with the other wrapping paper.
Picture
Below is a little less in uniform with the rest of my gifts because I added some Star Wars snowflakes I cut out because I thought it was a fun touch since he's a fan.
Picture
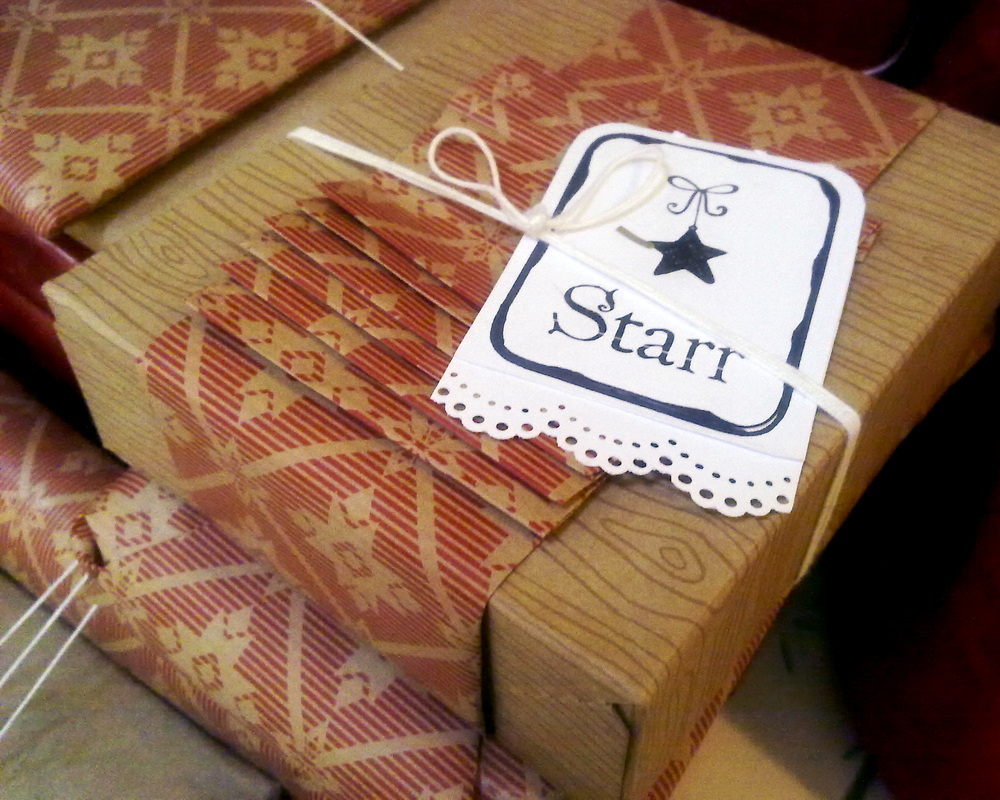
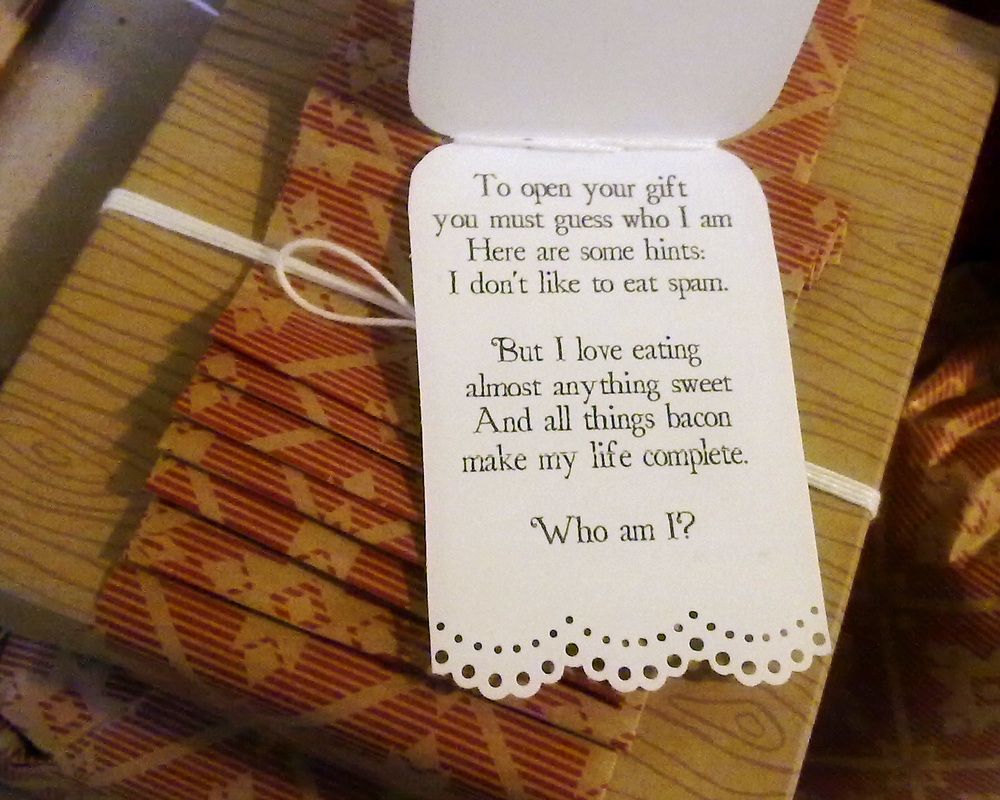
Then for this gift for my cousin Starr (as well as one other gift  that was given away before the pictures) I wrote a poem to help them guess who their secret santa is:
Picture
Picture
I'm a terrible poet, so don't judge me. But for someone who is really bad at rhyming, I find myself writing a lot of random poems for cards and gifts. 


I hope you all have finished your shopping and wrapping so you can relax!
As for me, I'm tempted to make a shirt that says "I survived my first Christmas working retail" and hoping that after Boxing Day I would actually be able to wear it. 
Word to the wise: don't work at two stores during the holiday season. Especially if you love Christmas because it will disrupt your chances to shop, wrap presents, sleep, and possibly your sanity too.
4 Comments

DIY: A Steaming Mug of Cocoa

12/16/2011

9 Comments

 
It's almost Christmas and despite starting my shopping in August, I have only just yesterday finished getting all of my gifts. Even though I practically live in the mall because of work, by the time I'm done I need to go home to sleep to do it all over again. But finally, I'm finished! I started my wrapping last week and just need to wrap the couple of gifts I bought yesterday and then I will be done.
Though after Christmas I will share how I wrapped my presents (so as not to expose myself to any of the Secret Santa gift exchanges I'm a part of), I wanted to share one of the gifts I am giving:

A mug of hot cocoa with mini marshmallows
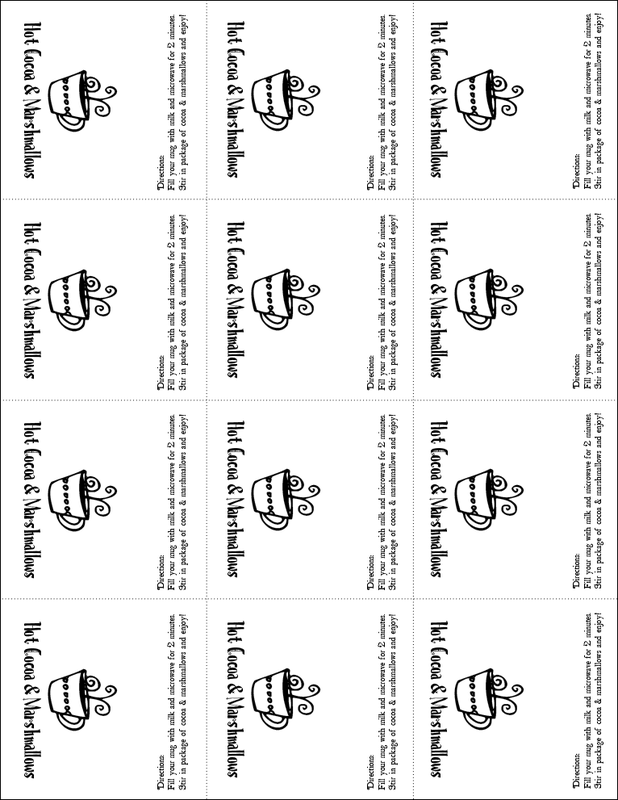
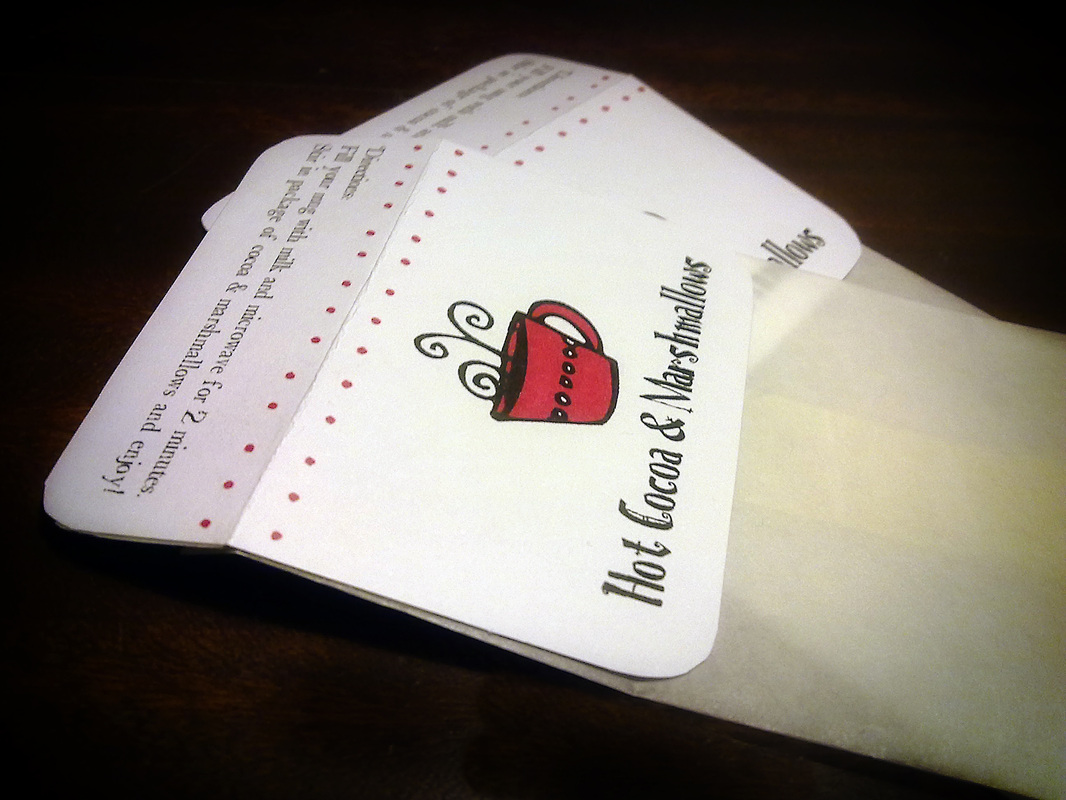
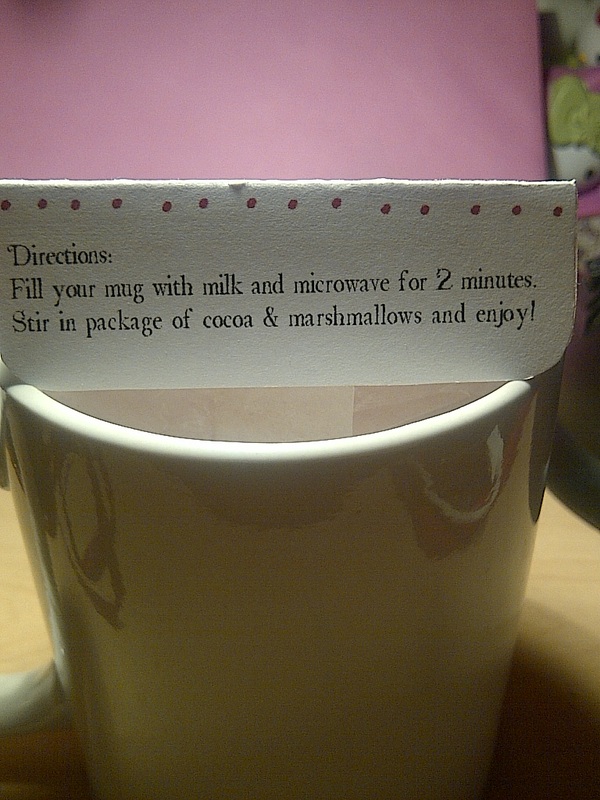
I started out with designing some simple Christmasy tags on InDesign (with little instructions on the back) that I printed on card stock, cut out, and coloured. Then I made some little baggies out of parchment paper. This took a lot longer than I projected and I probably should have just bought some from the craft store but oh well!
Picture
Click below to download the tags to make your own:
hot_cocoa_tags.pdf
File Size: 58 kb
File Type: pdf
Download File

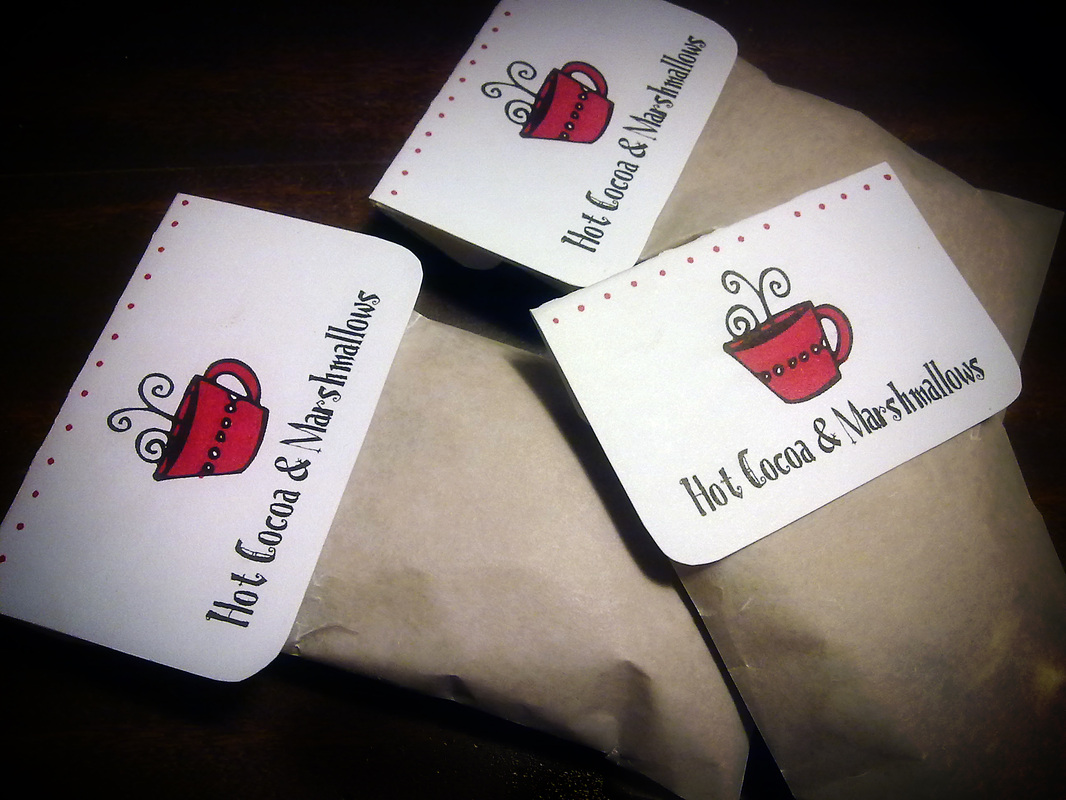
I decided make it feel a little more Christmasy by adding touches of red.
 Then I attached the labels onto the bags with double sided tape.
Picture
Then I filled each packet with mini marshmallows and enough cocoa for a nice chocolatey drink. I almost didn't make the bags big enough.
Picture
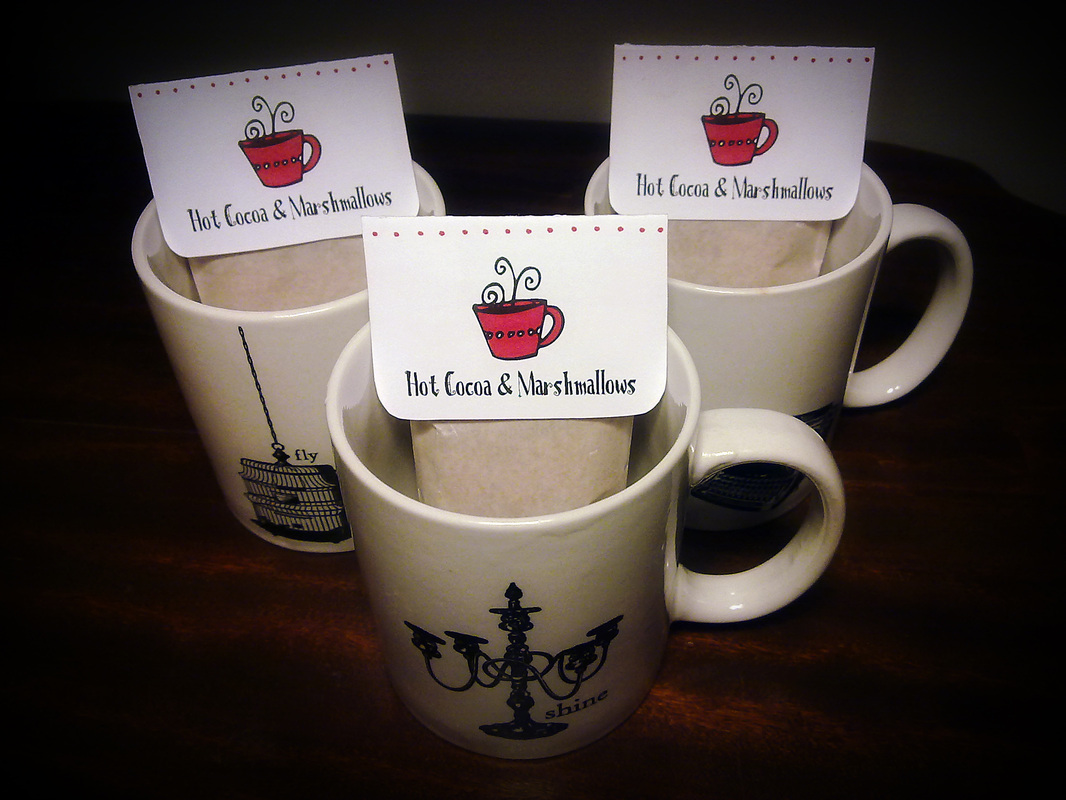
After being sealed with more double sided tape, each packet was put into the mug I chose for each friend. Here are a couple of them:
Picture
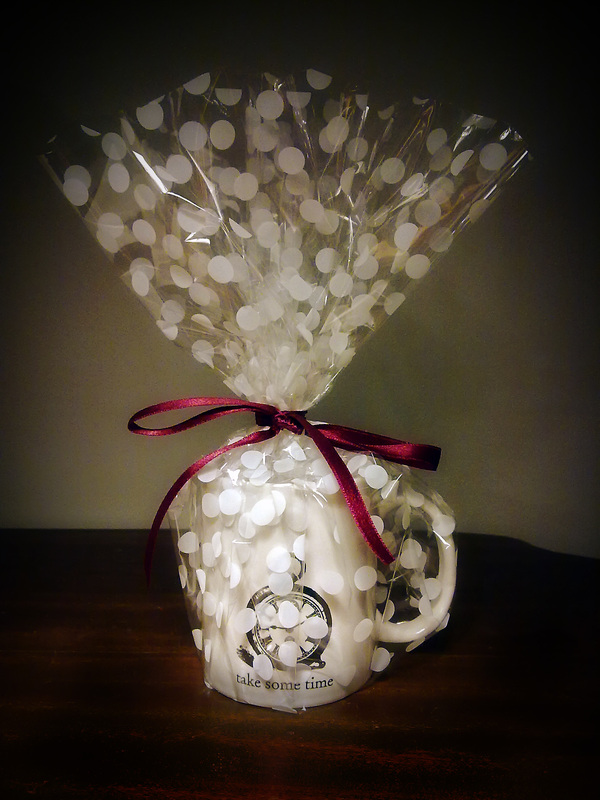
After that I wrapped them up in a cute white polka dotted cellophane that I found that matched the little cards I bought that had polka dotted mugs on the front. I love it when things are coordinated.
Picture
Tied it up some long red ribbon and voila!  A more crafty way to give a cup of cocoa as a present. I would have loved to make my own hot cocoa mix (I've seen a few neat recipes) but I just don't have the time for that. In fact, I need to get on to wrapping more presents before my cousins arrive to help clean and decorate my house for our big family Christmas this year.

Merry Christmas and to those of you who haven't finished (or started) shopping...good luck!

Update:
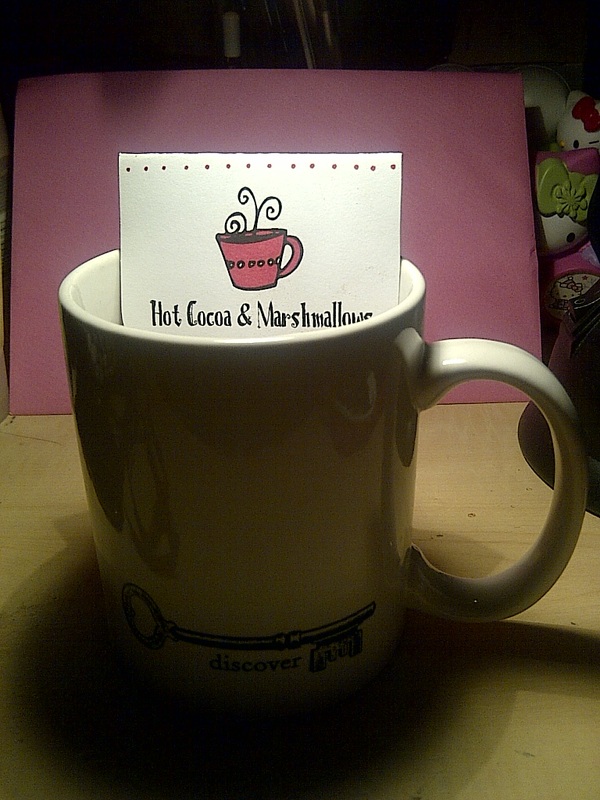
My friend took some pictures of her steaming cup of cocoa. I love the Hello Kitty peaking in the background. 
9 Comments

Pikachu Hats

12/10/2011

6 Comments

 
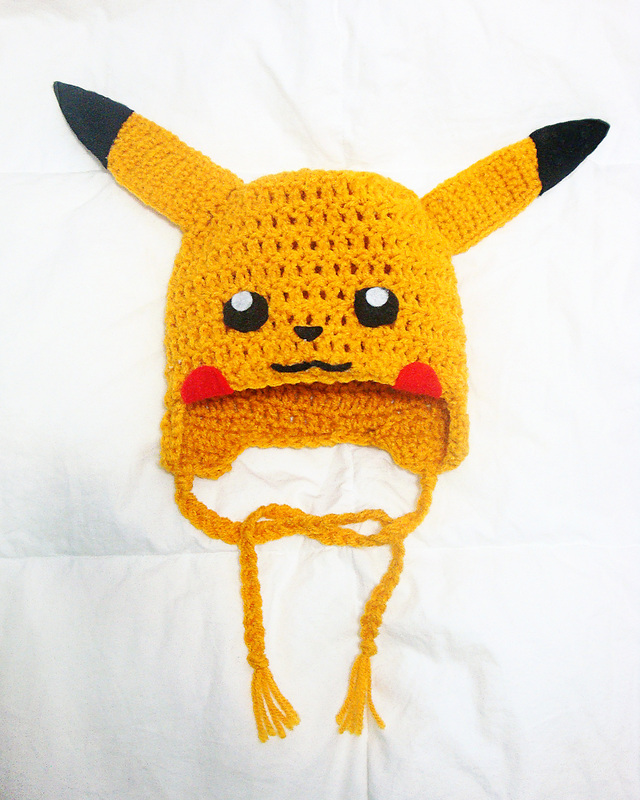
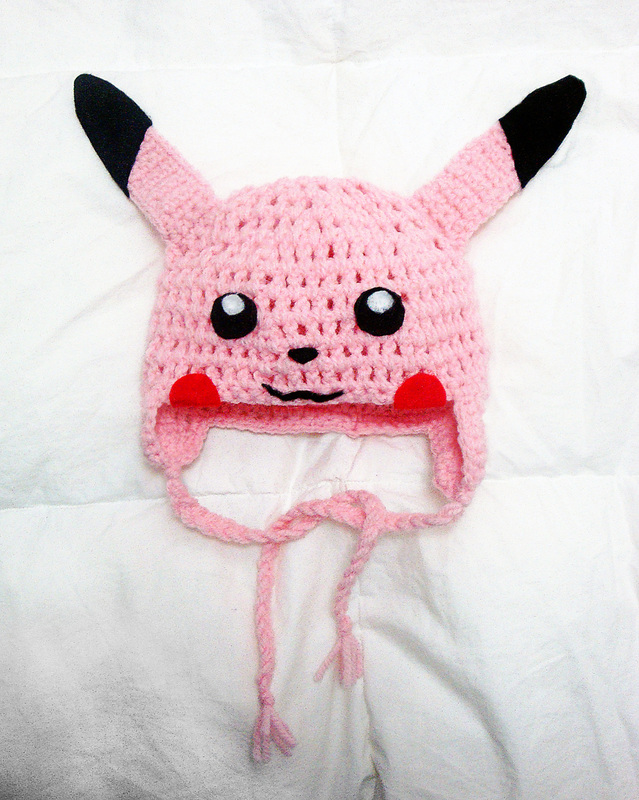
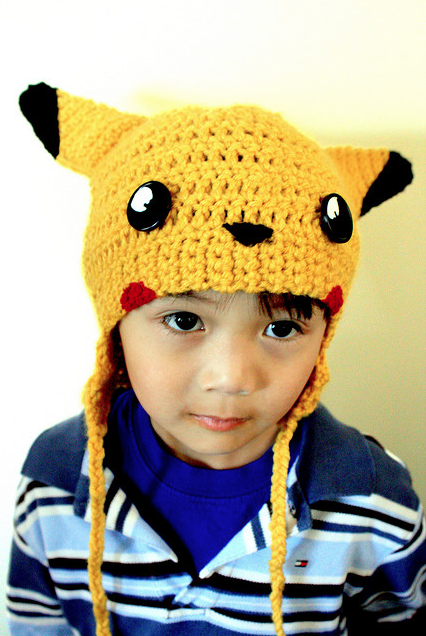
I don't crochet much anymore (though when I have time I do try to do some for Love Knits) but one of the most popular hats that I've had people order from me is the Pikachu hat.
This time it was two baby/child sized Pikachu hats. One of them was requested to be pink!
Picture
Picture
Here is the first one I ever made quite a few years back with paint and buttons details instead of felt.
Picture
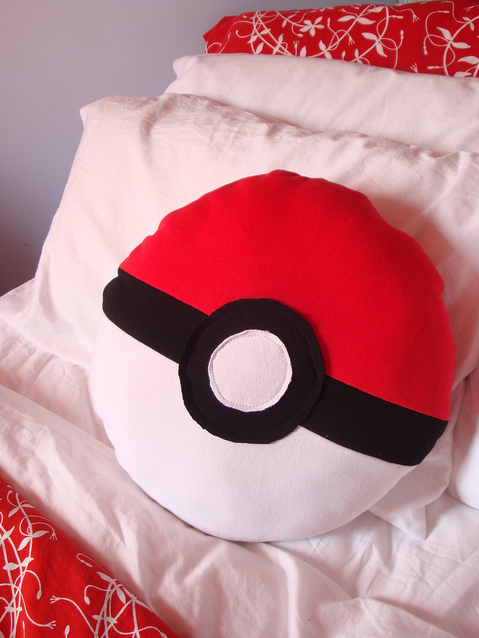
And here is the Pokeball pillow, just for good measure
Picture
I once made a Snorlax dress but I sold it before taking a picture of it. Oh well. Maybe I will make another one some day.
6 Comments
      My studio is called
      "The Fortress".
      But really, my 'studio' is just my bedroom over-flowing with fabric, yarn, buttons, paint, and what ever else I think could be used to make something out of some day.
      Eventually I will have a real studio, but until then I've got a desk and a
      brain  with ideas. This blog is where you can
      see what I've been up
      to in my spare time.

    Archives

    February 2015
    November 2014
    September 2014
    March 2014
    November 2013
    April 2013
    March 2013
    February 2013
    January 2013
    November 2012
    October 2012
    September 2012
    August 2012
    July 2012
    June 2012
    May 2012
    April 2012
    March 2012
    February 2012
    January 2012
    December 2011
    November 2011
    October 2011
    September 2011
    August 2011
    July 2011
    June 2011

    RSS Feed


    f a m i l y :
    Picture
    Picture
Powered by Create your own unique website with customizable templates.